Make a patchwork cushion or quilt - and be a 'Home Improvement Hero'
Young Quilters know if you want to make a fun simple project which will brighten up any space on a budget - make a cushion! Home Improvement Hero contest sponsored by Moneysupermarket.com challenged crafty bloggers to make something to improve their home with a budget of £50.
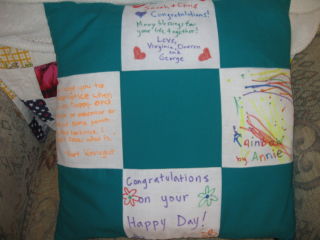
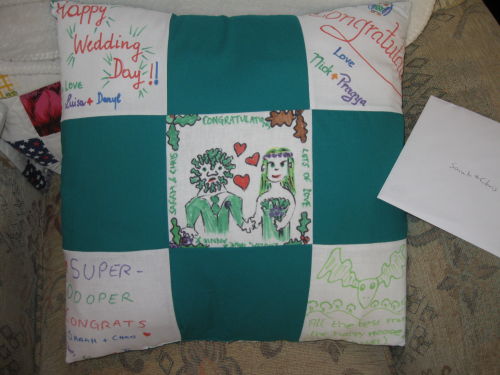
I adapted the patchwork cushion cover instructions from the recent issue of the YQ Newsletter to make a nine patch cushion using squares of fabric decorated by friends using fabric pens. You can download the instructions below to make your own cushion.
If you've mastered the cushion, why not try a whole quilt? Here are quick, simple instructions for the quilt I made.
What you need:
- 56 fabric squares, each 6.5 inches X 6.5 inches
- Pins
- A piece of fabric 41 inches X 46 inches for the back (I sewed together two smaller pieces to get one this size)
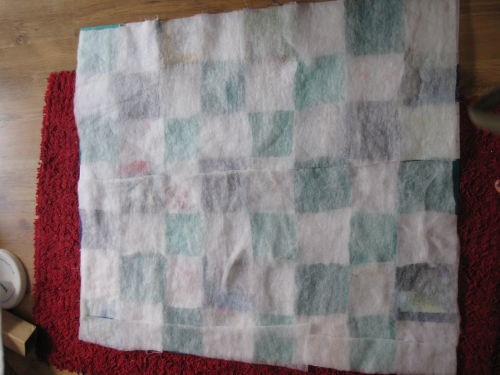
- A piece of wadding 40 X 45 inches
- Embroidery floss for 'tying' the quilt (a simple form of quilting)
- Scissors
- Cardboard (eg from a cereal packet)
- Thread
- A sewing machine (or a needle and time to sew by hand)
- Iron
- From a piece of cardboard, make a square template measuring 6.5 X 6.5 inches
- Use your template to draw 56 squares onto the back of your fabrics. Cut out the fabric squares.
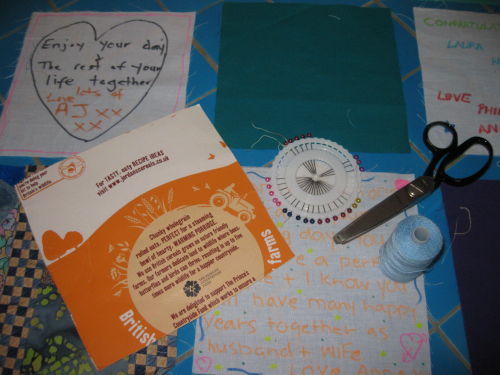
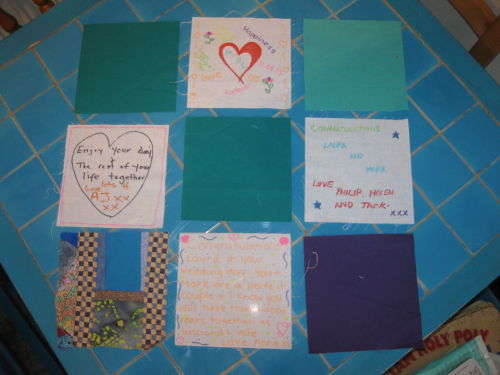
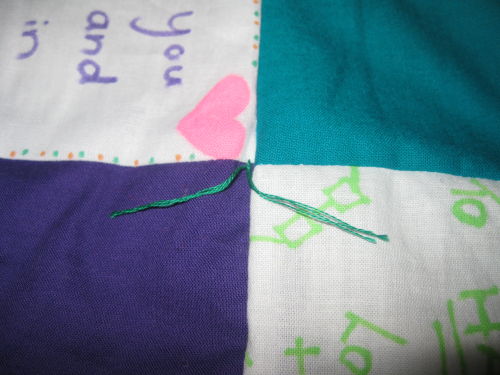
- Have your friends decorate the squares using fabric pens and don't forget to do one yourself! Arrange all of the squares in an attractive pattern for the quilt top (take a photo to remember the order).
- Place two squares right sides together. Machine stitch down one edge using a 1/4 seam allowance.
- Add another square to make a row. Repeat to make 8 rows of 7 squares each.
- Press (iron) each row.
- Pin two rows together, matching the corners of the square blocks, and sew the rows together.
- Repeat until you have sewn all of the rows together, it's really looking like a quilt now!
- Make a quilt sandwich. Lay your backing fabric face up, lay the quilt top over the backing fabric face down. The backing and the top are 'right sides facing'. Place the wadding on top. Now you have a quilt sandwich with the quilt top in the middle.
- Tack the three layers together by making big stitches in the quilt to hold it together. These tacking threads will come out later.
- Sew around the four edges of the quilt, leaving a gap of about 12 inches in one side. Cut the corners, making sure to not cut the stitching.
- Pull the fabric through the hole, so that the right sides are now facing out and the wadding is in the middle.
- Sew up the 12 inch gap by hand.
- 'Quilt' the quilt using the embroidery floss. Make a stitch in each corner of every square and tie a double knot. This is a quick and easy way to 'quilt' and will hold the three layers together. Remove the tacking threads.
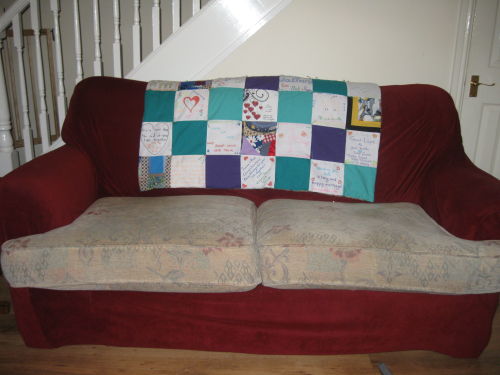
Now enjoy wrapping up in your cosy quilt when you watch a film or your favourite show, and admire it decorating the back of the sofa too!

Related Documents
Patchwork Cushion Tutorial (96.36kB)
Patchwork cushion tutorial


